


Resolution (megapixels)
With today’s cameras capable of taking pictures of over 20 MP (million pixels) it is good to realise that even though not using enough pixels can lead to poor results, using too many pixels only increases processing time and storage. PictureMe is an event photography application, and typical for event photography is that you prefer to spend as little time per customer as possible, to increase throughput and revenue. It is important to know what is needed for the output you are creating. If the output you want is a 2″ x 3″ print, then you will need only a few MP. Even if you stick to the high resolution of 300 dpi, this means that your output only needs to be 2×300 x 3×300 pixels, which is only 0.54 MP. It’s likely, your output will not be larger than letter (A4) size. In that case, you will need 8.5×300 x 11×300 = 8.4 MP. So for event photography, you will likely never need more than 10 MP. The table below shows the image size and needed pixels that are common, based on 240 dpi, which many imaging specialists (including myself) consider the maximum resolution the human eye is capable of seeing.
| Output Dimensions | Width | Height | Dpi | Pixels | MP |
| 2″ x 3″ / 5x7cm | 3 | 2 | 240 | 720 x 480 | 0.35 |
| 4″ x 6″ /102 x 152mm | 6 | 4 | 240 | 1440 x 960 | 1.38 |
| 5″ x 7″ / 127x178mm | 7 | 5 | 240 | 1680 x 1200 | 2.02 |
| Letter/A4 | 8,5 | 11 | 240 | 2640 x 2040 | 5.39 |
So if you want faster processing without sacrificing quality, choose the appropriate resolution in your camera.
As you are likely to only cover part of the background image with the pictures you take with PictureMe, it’s fine to use the resolution nearest your output dimensions require, even if that is a little lower in width or height. You can use more, but know that if you use a 12MP picture, you will increase processing and storage time between 2 to 50 times! Note that this also applies to the backdrop images and overlays you use; if you create them for an event where you will print 4×6″, make sure the background and overlay aren’t much larger then what the above table shows; you will be able to process more shots and make more in the same amount of time.
Lighting
PictureMe is very forgiving when it comes to lighting your green screen. Wrinkles, shadow areas have very little effect on the chromakeying algorithm used, unlike most video chromakey apps, that only chromakey one specific color. So rather than trying to get the lighting 100% even and ironing out all wrinkles, focus on the distance between your subjects and the green screen. If they are close, then it is likely that light will bounce from the green screen back onto the subjects, turning them greenish. And that will result in gaps in the processed picture. You can simply avoid that by having some distance between the subject and the green screen, at least 3 feet, but the more, the better. Most green screens are pretty big, and easily allow a few feet between the subject and the green screen, without the edges of the green screen becoming visible. Although it’s not impossible to use daylight, flash light is preferable. It also helps to use two flashes, preferably soft boxes, so you will not get sharp shadow lines from the flashes, and the two soft boxes prevent shadows altogether.
Framing
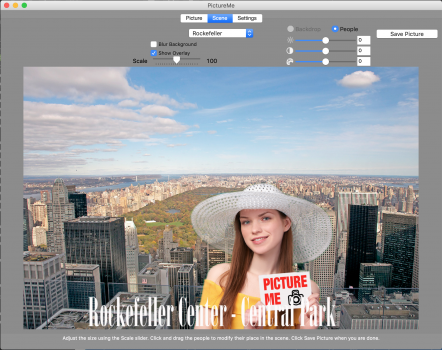
Last but not least, framing is important; make sure the subjects are 100% in front of the green screen, as any part that is not, will not be part of the picture, which means less freedom to move the picture on the scene in PictureMe. It’s also good to know that PictureMe reads the backdrop color from the top horizontal line of the shot; the reason being that it’s possible that the bottom or sides are blocked by (one of) the subjects. If you cannot manage to keep the top horizontal pixel line green, then you can manually choose the chromakey color in PictureMe by clicking on it the left window.
Sliders
Finally, the chromakey quality is determined by the Sliders. Start with both sliders to the left, and increase the top slider until all green is gone. Then use the bottom slider to retrieve any gaps in your subjects if needed. Once you have set them, and your lighting is constant (by using soft box flash light) you can take pictures and they will be perfect almost every time. One final tip; if your subject has dark hair, then it might be difficult to spot gaps in parts of the hair. To make that easier, you can click on the right window, and select a custom color. That color will then be used as a background color, making it easier to set the sliders and see if any gaps need to be fixed.
Manual retouching
If you have followed all the above guidelines, you should be easy to do green screen event photography with PictureMe without manual retouching. But sometimes you will have to retouch manually anyway, for instance when the subject happens to be wearing something that has the same color as your green screen. In that case, you can quickly paint in any gaps that might show. Don’t worry if you overdo it a little; you can use the eraser to correct. Eyes are usually detected (on Mac versions of PictureMe) by face detection, so even green eyes on a green screen, or blue eyes on a blue screen should be no issue. For Windows users; use the brush to quickly preserve the eyes.
If you are still having problems with getting good results from PictureMe, please feel free to contact us through the support form and we’d be happy to help.